IdeaApp Services
IdeaApp - Services application
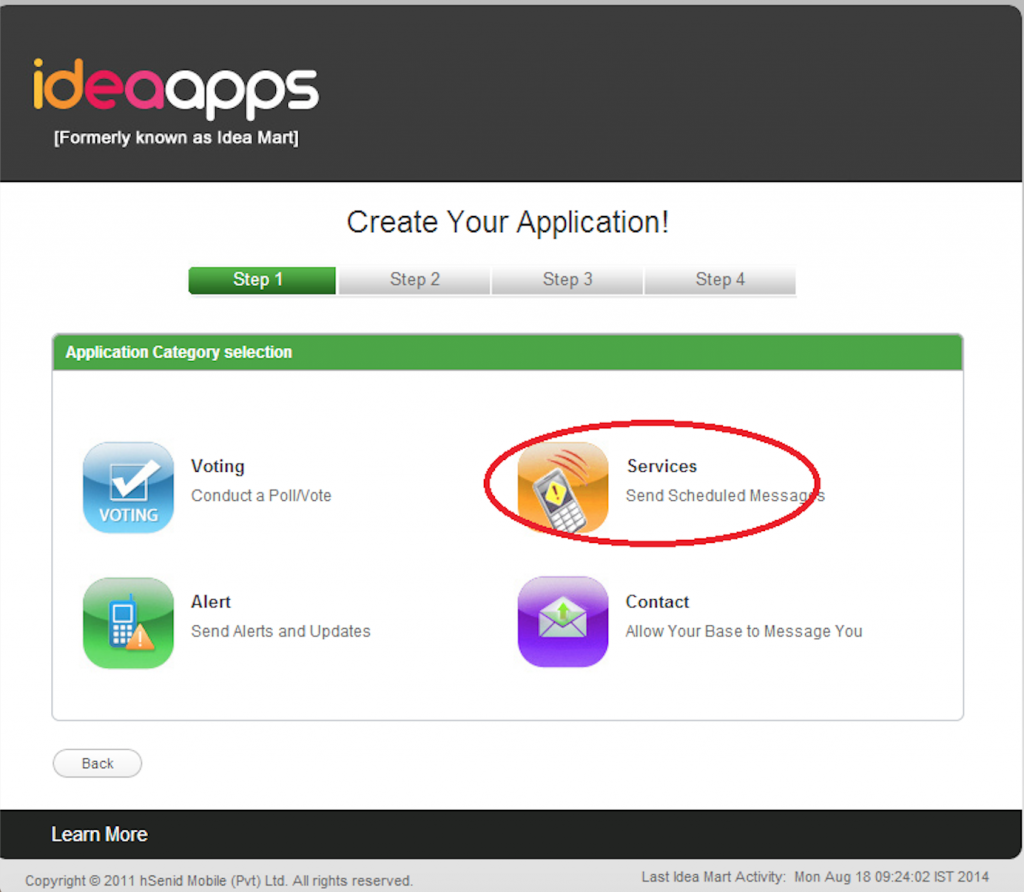
Step 1
Click on the Services button as follows.
Step 2
Then fill the details regarding your Service application.
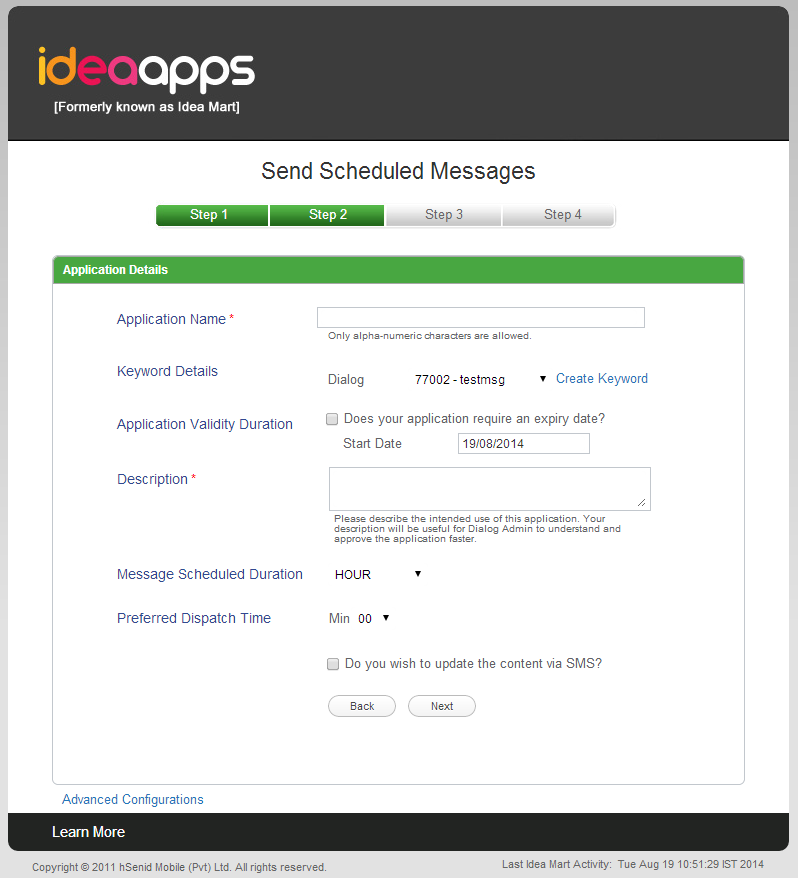
Application Name – Should have 4-9 characters.
Keyword – Click on the Create Keyword.
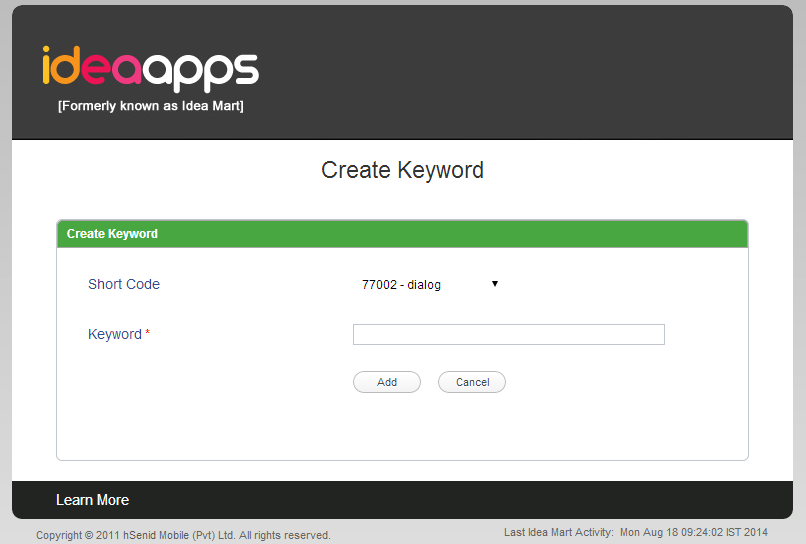
- Select a Short Code from the given list and enter a Keyword.
Keyword must be a simple unique term which doesn’t already exist. Click on the Addbutton once you enter it.
Application Validity Duration – If your Voting Application is limited for a certain period of time, select the Does your application require an expiry date? box and specify the expiry date.
Description – Give a proper description about your application and its purpose because it will be easier to approve your app quickly.
Message Scheduled Duration – You can select it as HOUR, DAY, WEEK or MONTH.
Preferred Dispatch Time – Varies according what you select on Message Scheduled Duration.
Select the box Do you need to update the content via SMS, if you need to update the content so.
Click Next.
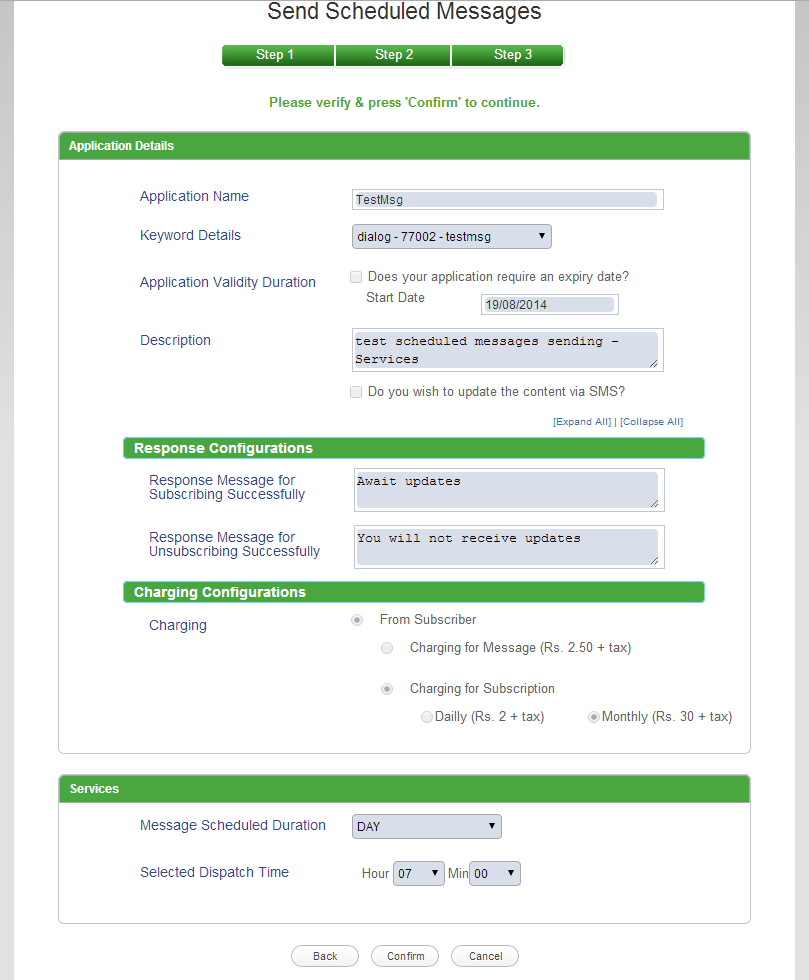
Step 3
The provided details will be displayed as follows.
-
Response Configuarations – The above mentioned details are set by default.
-
Charging Configuarations – The above mentioned details are set by default.
Re -check the details you have entered, modify any changes and click Confirm.
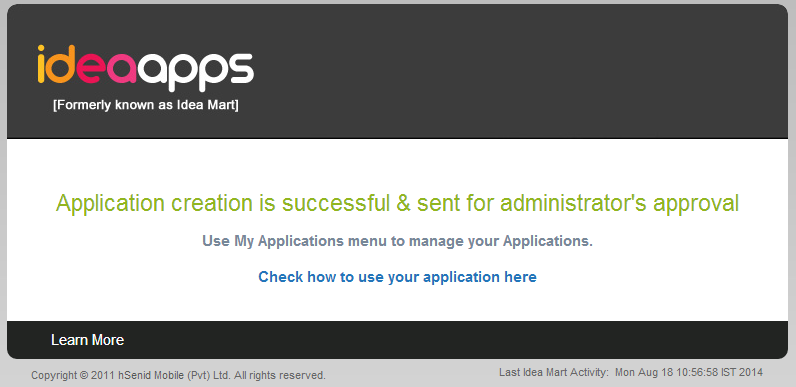
Finally you will see the following.